Больше года назад я описывал установку связки rTorrent и ruTorrent, где rTorrent устанавливался из репозитория, а все шаги установки я попытался максимально упростить. Сегодня мне опять потребовалось установить данную связку, но в этот раз всё получилось намного чище и как-то правильнее.
Поэтому если вам нужно установить rTorrent и ruTorrent в Ubuntu - лучше воспользуйтесь именно этой инструкцией. 🙂
Итак, установим необходимые пакеты:
|
1
|
sudo
apt
-
get
install
subversion
build
-
essential
automake
libtool
libcppunit
-
dev
libcurl3
-
dev
libsigc
++
-
2.0
-
dev
unzip
unrar
-
free
curl
libncurses5
-
dev
apache2
php5
php5
-
cli
php5
-
curl
-
y
|
Включим scgi в Apache:
|
1
2
|
sudo
apt
-
get
install
libapache2
-
mod
-
scgi
sudo
ln
-
s
/
etc
/
apache2
/
mods
-
available
/
scgi
.load
/
etc
/
apache2
/
mods
-
enabled
/
scgi
.load
|
Установим xmlrpc-c:
|
1
2
3
4
5
|
svn
checkout
http
:
/
/
xmlrpc
-
c
.svn
.sourceforge
.net
/
svnroot
/
xmlrpc
-
c
/
stable
xmlrpc
-
c
cd
xmlrpc
-
c
.
/
configure
--
disable
-
cplusplus
make
sudo
make
install
|
Установим libtorrent:
|
1
2
3
4
5
6
7
|
wget
http
:
/
/
libtorrent
.rakshasa
.no
/
downloads
/
libtorrent
-
0.13.2.tar.gz
tar
xvf
libtorrent
-
0.13.2.tar.gz
cd
libtorrent
-
0.13.2
/
.
/
autogen
.sh
.
/
configure
make
sudo
make
install
|
Установка rTorrent
Итак, одна из самых важных частей - установка rTorrent. Он будет предварительно скомпилирован с поддержкой xmlrpc-c.
|
1
2
3
4
5
6
7
8
|
wget
http
:
/
/
libtorrent
.rakshasa
.no
/
downloads
/
rtorrent
-
0.9.2.tar.gz
tar
xvf
rtorrent
-
0.9.2.tar.gz
cd
rtorrent
-
0.9.2
/
.
/
autogen
.sh
.
/
configure
--
with
-
xmlrpc
-
c
make
sudo
make
install
sudo
ldconfig
|
Создайте необходимые директории:
|
1
2
|
mkdir
~
/
Torrents
mkdir
~
/
Torrents
/
.session
|
Настройка rTorrent с помощью .rtorrent.rc
Теперь займёмся файлом .rtorrent.rc (файл с настройками rtorrent). В начале скачайте его:
|
1
2
|
cd
~
/
wget
https
:
/
/
rtgui
.googlecode
.com
/
files
/
.rtorrent
.rc
|
Затем отредактируйте на своё усмотрение:
|
1
|
nano
.rtorrent
.rc
|
У меня получилось так:
|
1
2
3
4
5
6
7
8
9
10
11
12
13
14
15
16
17
18
19
20
21
22
23
24
25
26
27
28
29
30
31
32
33
34
35
36
37
38
39
40
41
42
43
44
45
46
47
48
49
50
51
52
53
54
55
56
57
58
59
60
61
62
63
64
65
66
67
68
69
70
71
72
73
74
75
76
77
78
79
80
81
82
83
84
85
86
87
88
89
90
91
92
93
94
95
96
97
98
99
100
101
102
103
104
105
106
107
108
109
110
111
112
113
114
115
116
|
# Maximum and minimum number of peers to connect to per torrent.
min_peers
=
100
max_peers
=
1000
# Same as above but for seeding completed torrents (-1 = same as downloading)
min_peers_seed
=
10
max_peers_seed
=
100
# Maximum number of simultanious uploads per torrent.
max_uploads
=
100
# Global upload and download rate in KiB. "0" for unlimited.
download_rate
=
0
upload_rate
=
0
# Default directory to save the downloaded torrents.
directory
=
/
home
/
sk8er
/
Torrents
# Default session directory. Make sure you don`t run multiple instance
# of rtorrent using the same session directory. Perhaps using a
# relative path?
session
=
/
home
/
sk8er
/
Torrents
/
.
session
# Watch a directory for new torrents, and stop those that have been
# deleted.
#schedule = watch_directory,5,5,load_start=/Torrents/TorrentFiles/Auto/*.torrent
#schedule = untied_directory,5,5,stop_untied=
# Close torrents when diskspace is low. */
#schedule = low_diskspace,5,60,close_low_diskspace=100M
# Stop torrents when reaching upload ratio in percent,
# when also reaching total upload in bytes, or when
# reaching final upload ratio in percent.
# example: stop at ratio 2.0 with at least 200 MB uploaded, or else ratio 20.0
#schedule = ratio,60,60,stop_on_ratio=200,200M,2000
#execute_log = /home/sk8er/.rtorrent.log
# When the torrent finishes, it executes "mv -n
# and then sets the destination directory to "~/Download/". (0.7.7+)
#on_finished = move_complete,"execute=mv,-u,$d.get_base_path=,/Torrents/Complete/ ;d.set_directory=/Torrents/Complete/"
# The ip address reported to the tracker.
#ip = 127.0.0.1
#ip = rakshasa.no
# The ip address the listening socket and outgoing connections is
# bound to.
#bind = 127.0.0.1
#bind = rakshasa.no
# Port range to use for listening.
port_range
=
55556
-
55560
scgi_port
=
127.0.0.1
:
5000
# Start opening ports at a random position within the port range.
port_random
=
no
# Check hash for finished torrents. Might be usefull until the bug is
# fixed that causes lack of diskspace not to be properly reported.
check_hash
=
no
# Set whetever the client should try to connect to UDP trackers.
use_udp_trackers
=
yes
# Alternative calls to bind and ip that should handle dynamic ip`s.
#schedule = ip_tick,0,1800,ip=rakshasa
#schedule = bind_tick,0,1800,bind=rakshasa
# Encryption options, set to none (default) or any combination of the following:
# allow_incoming, try_outgoing, require, require_RC4, enable_retry, prefer_plaintext
#
# The example value allows incoming encrypted connections, starts unencrypted
# outgoing connections but retries with encryption if they fail, preferring
# plaintext to RC4 encryption after the encrypted handshake
#
encryption
=
allow_incoming
,
enable_retry
,
prefer_plaintext
#
# Do not modify the following parameters unless you know what you`re doing.
#
# Hash read-ahead controls how many MB to request the kernel to read
# ahead. If the value is too low the disk may not be fully utilized,
# while if too high the kernel might not be able to keep the read
# pages in memory thus end up trashing.
#hash_read_ahead = 10
# Interval between attempts to check the hash, in milliseconds.
#hash_interval = 100
# Number of attempts to check the hash while using the mincore status,
# before forcing. Overworked systems might need lower values to get a
# decent hash checking rate.
#hash_max_tries = 10
# Max number of files to keep open simultaniously.
#max_open_files = 128
# Number of sockets to simultaneously keep open.
#max_open_sockets =
# Example of scheduling commands: Switch between two ip`s every 5
# seconds.
#schedule = "ip_tick1,5,10,ip=torretta"
#schedule = "ip_tick2,10,10,ip=lampedusa"
# Remove a scheduled event.
#schedule_remove = "ip_tick1"
# Set file permission created with rtorrent (777)
system
.
umask
.
set
=
0000
system
.
file_allocate
.
set
=
yes
|
Установка ruTorrent
Теперь установим веб-интерфейс ruTorrent для управления торрентами:
|
1
2
3
4
5
6
7
|
wget
http
:
/
/
rutorrent
.googlecode
.com
/
files
/
rutorrent
-
3.4.tar.gz
tar
xvf
rutorrent
-
3.4.tar.gz
sudo
mv
rutorrent
/
var
/
www
wget
http
:
/
/
rutorrent
.googlecode
.com
/
files
/
plugins
-
3.4.tar.gz
tar
xvf
plugins
-
3.4.tar.gz
sudo
mv
plugins
/
var
/
www
/
rutorrent
sudo
chown
-
R
www
-
data
:
www
-
data
/
var
/
www
/
rutorrent
|
Немного обезопасим доступ:
|
1
2
3
4
5
6
|
sudo
a2enmod
ssl
sudo
a2enmod
auth_digest
sudo
a2enmod
scgi
sudo
openssl
req
$
@
-
new
-
x509
-
days
365
-
nodes
-
out
/
etc
/
apache2
/
apache
.pem
-
keyout
/
etc
/
apache2
/
apache
.pem
sudo
chmod
600
/
etc
/
apache2
/
apache
.pem
sudo
htdigest
-
c
/
etc
/
apache2
/
passwords
seedbox
username
|
Вместо "username" в последней команде вам нужно ввести имя пользователя, затем два раза пароль. Они будут запрашиваться при открытии ruTorrent.
|
1
2
3
4
5
|
cd
/
etc
/
apache2
/
sites
-
available
/
sudo
rm
-
rf
default
sudo
wget
http
:
/
/
vps6
.net
/
src
/
default
sudo
a2ensite
default
-
ssl
sudo
apache2ctl
restart
|
Установим screen:
|
1
|
sudo
apt
-
get
install
screen
-
y
|
Запустим rTorrent:
|
1
|
screen
-
fa
-
d
-
m
rtorrent
|
Настроим rTorrent как сервис:
|
1
2
3
4
5
|
cd
~
/
wget
http
:
/
/
libtorrent
.rakshasa
.no
/
raw
-
attachment
/
wiki
/
RTorrentCommonTasks
/
rtorrentInit
.sh
sudo
mv
rtorrentInit
.sh
/
etc
/
init
.d
/
rtorrent
sudo
nano
/
etc
/
init
.d
/
rtorrent
sudo
chmod
755
/
etc
/
init
.d
/
rtorrent
|
Во время редактирования файла, найдите строчку user="user", и впишите логин своего пользователя в кавычках.
Добавим rTorrent в автозагрузку:
|
1
|
sudo
update
-
rc
.d
rtorrent
defaults
|
Команда, чтобы убрать rTorrent из автозагрузки:
|
1
|
sudo
update
-
rc
.d
-
f
rtorrent
remove
|
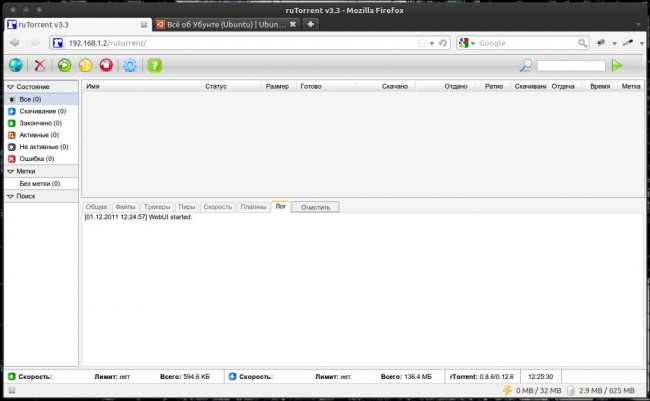
Всё, rTorrent запущен и работает. Можете перейти в ruTorrent по адресу /ip_сервера/rutorrent.
Рекомендую установить пакеты mediainfo и ffmpeg, они требуются некоторым плагинам:
|
1
|
sudo
apt
-
get
install
mediainfo
ffmpeg
-
y
|
Вот и всё.


 2 Март, 2021
  Борис
Борис 
